Lets Automate It

from Josh Rickard

Ipad Lockdown Mobileconfig

2018-08-07 Josh Rickard

It is possible to put an iPad or iPhone into ‘Store Demo’ mode so that the home button and swipe to home gesture is disabled. If you have seen the iPads in the Apple Store running the smart sign apps then you will know what I mean.

It is actually pretty trivial to make this work, all you need to do is install a correctly formatted mobile config plist over the air from a web server.

Continue reading
Questions About Mdt 2012 Driver Setup

2018-08-07 Josh Rickard

So I’ve had a lot of questions about my MDT 2012 Driver setup and hopefully this post will explain a little bit about it.  Let me know if you have any questions

Personally I have a folder on my server called _Source_Drivers.  I keep all my drivers here and import them into MDT but keep the original.  Here is what my file structure of this folder looks like.

MDT Source Drivers Structure

Continue reading

Mdt 2012 Installing a Custom Dictionary in Office 2010

2018-08-07 Josh Rickard

So, some might not need this but thought I would share anyways.  I have created my new MDT 2012 Deployment Share and want to add Microsoft Office 2010 as an application, but I also need to customize that deployment of Office 2010 when I’m deploying my new OS.  Here are the steps on how to do this, but also how to create a custom Office 2010 Install.

  1. Once you've setup everything for you OS, go to the Applications folder on your Deployment Share and right click>New Application
  2. Once there, put in the relavent information including where your resource CD is located.
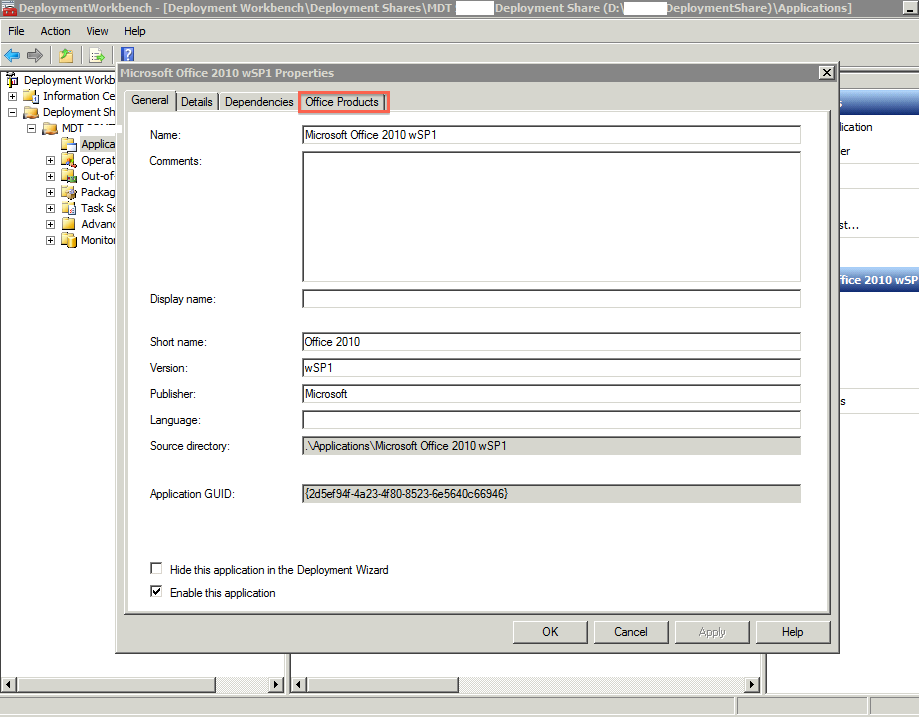
  3. THen once you have done this, you will notice that there is an extra tab compared to other applications.  This is because Microsoft Deployment Toolkit recognizes that it's Office 2010 and gives you a few more options.
  4. 50
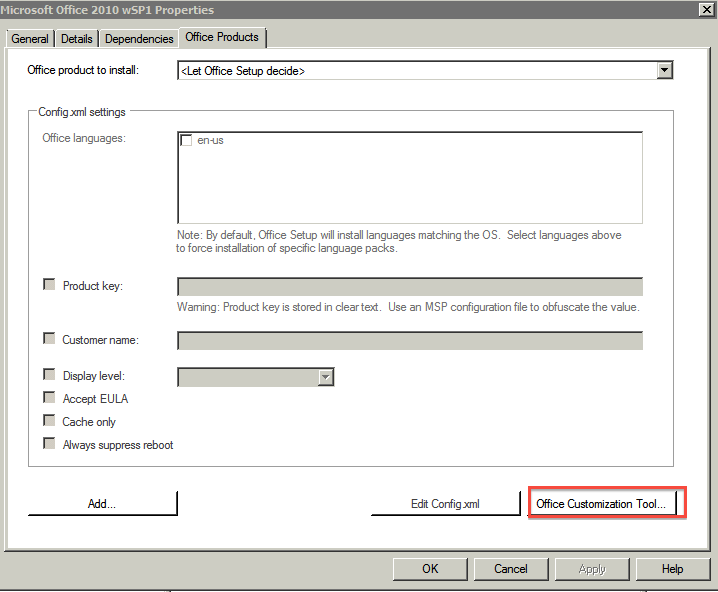
  5. Click on the Office Products Tab and you should now see this screen:
  6. 51
  7. Now click on the Office Customization Tool
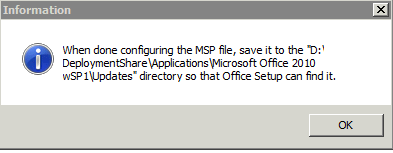
  8. You will be prompted with a warning box, please read and understand this.  Any Customizations you make are saved in a customization file and need to be moved to the appropriate folder within your Office 2010 source file.
  9. 52
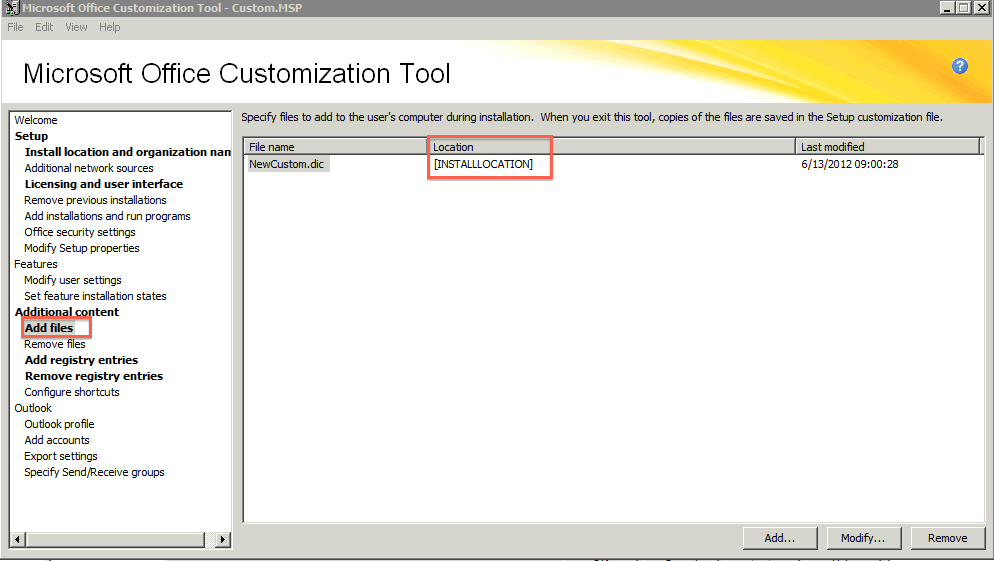
  10. Then the Office Customization Tool dialog box shows up.  You can do ton's of customizations but for this post it's all about adding a Custom Dictionary to Office 2010.
  11. 54
  12. Once there select Add Files and go to where your .Dic file is at and make sure you select INSTALLLOCATION as the option.
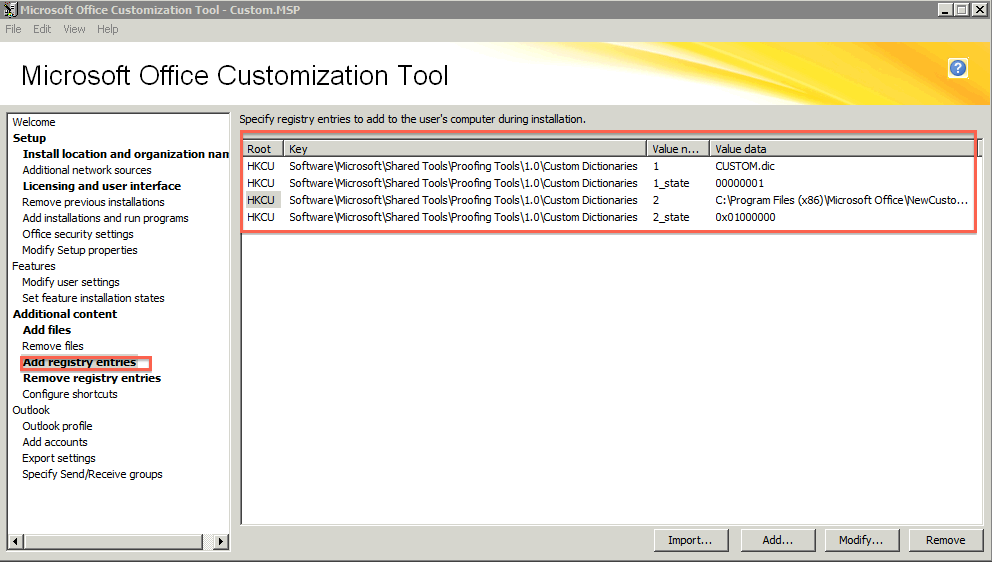
  13. Then click on Add Registry Entires
  14. 55
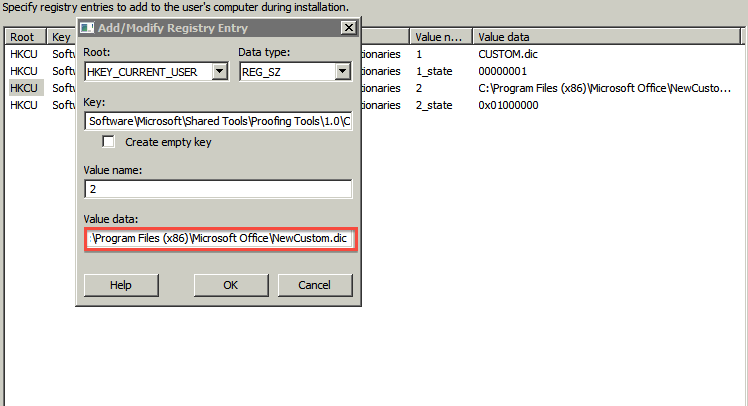
  15. Add the Registry settings that you see in the image above
  16. Here is a more detailed view of what you should see when you select Add... in the bottom corner:
  17. 57
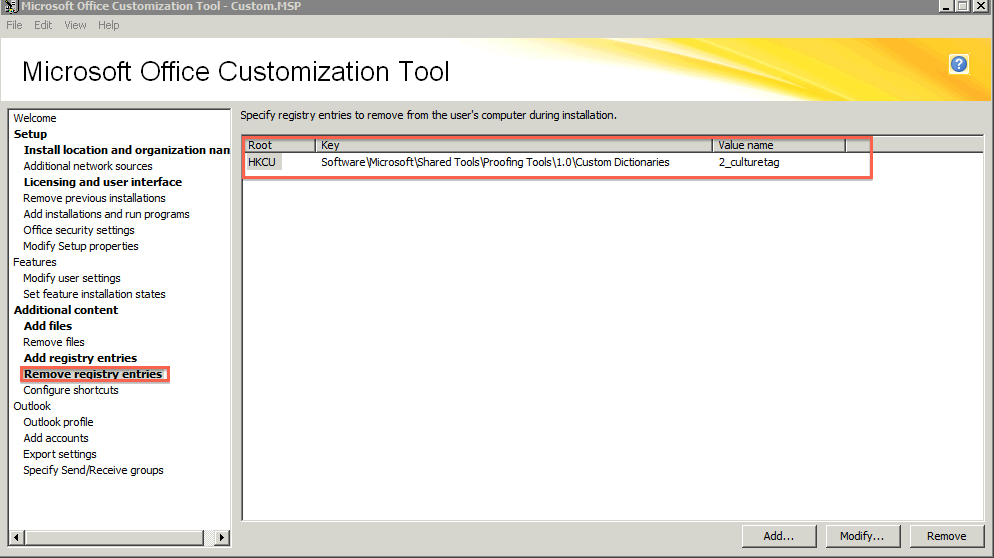
  18. Then select Remove Registry Entries, this is needed to remove any previous settings when Office 2010 Installs originally.
  19. 56
  20. That's it, now save your MSP File in the appropriate location and you should be good to go.

Mdt 2012 Deployment Guide Step by Step 11 of 11

2018-08-07 Josh Rickard

Preparing WDS to enable PXE Boot (optional but very useful)

  1. Minimize the Deployment Workbench application
  2. Open “Windows Deployment Services” from Start/Admin Tools
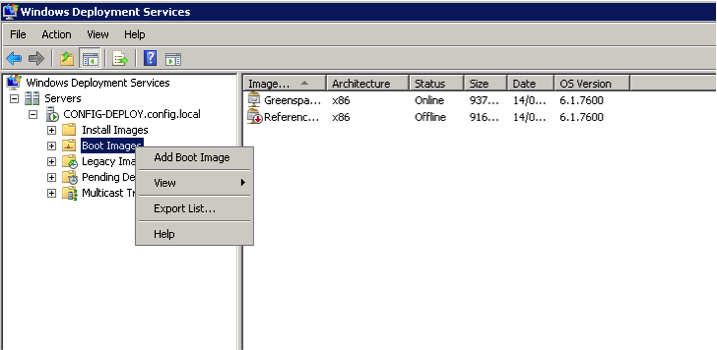
  3. Expand Servers / CONFIG-DEPLOY.config.local and right-click on Boot Images and select Add Boot Image. If the boot image already exists, right click on it and select Replace Boot Image to replace it with a newer version

37

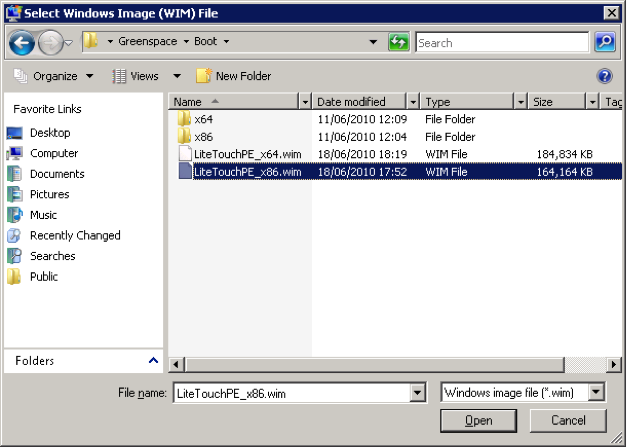
  1. Browse to the Deployment Share location (e.g. E:\DeploymentShares\Customername) and open the Boot folder
  2. Select the LiteTouchPE_x86.wim file and click Open

 38

Continue reading

Mdt 2012 Deployment Guide Step by Step 10 of 11

2018-08-07 Josh Rickard

Automating the Deployment Process

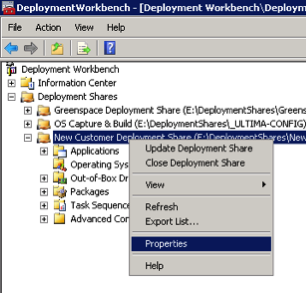
  1. Right-click on the deployment share and select Properties

 36

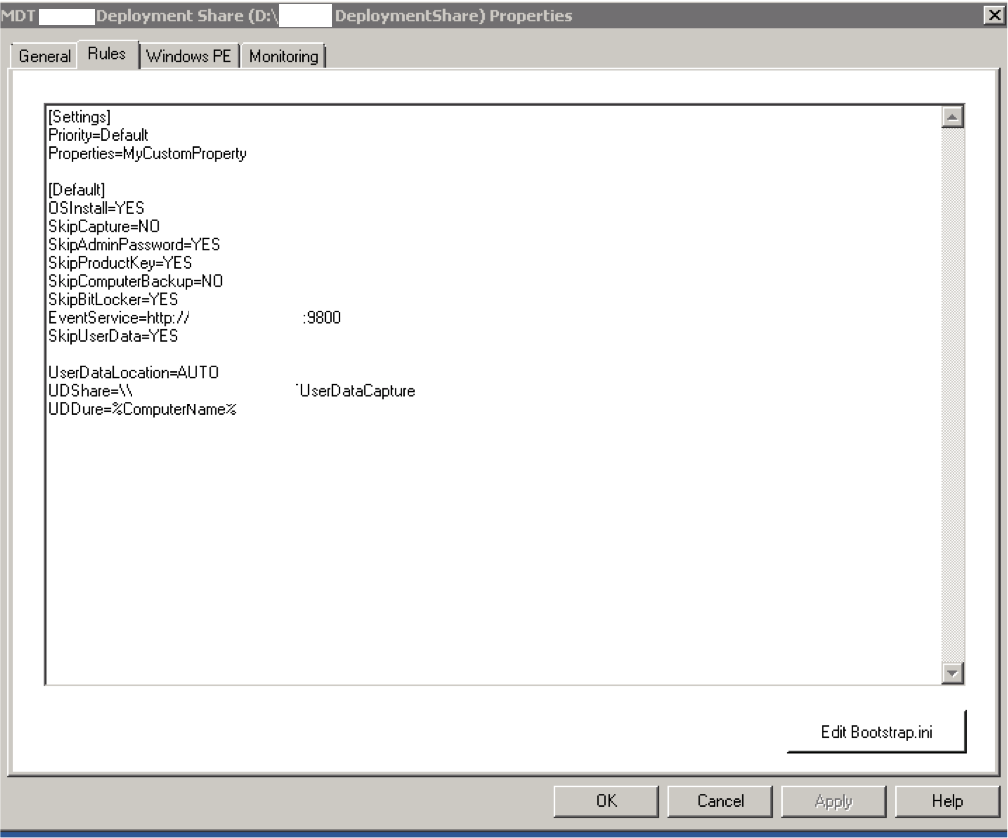
  1. Select the “Rules” tab
  2. In the main window, edit the settings as required.  A sample CUSTOMSETTINGS.INI is below but feel free to change it as needed…
  3. 35
CUSTOMSETTINGS.INI
[Settings]

Priority=Default

[Default ]

_SMSTSORGNAME=Customer

SkipBDDWelcome=YES

SkipProductKey=YES

ProductKey= XXXX-XXXX-XXXXX-XXXXX

OverrideProductKey=XXXX-XXXX-XXXXX-XXXXX

SkipDeploymentType=YES

DeploymentType=NEWCOMPUTER

SkipDomainMembership=NO

JoinDomain=domain.com

DomainAdminDomain=domain.com

DomainAdmin=MDTAddComputer

DomainAdminPassword=Pa55w0rd

MachineObjectOU=ou=example,dc=domain,dc=com

OrgName=Customer

SkipUserData=YES

SkipTaskSequence=NO

TaskSequenceID=TASKSEQID

Continue reading

Mdt 2012 Deployment Guide Step by Step 9 of 11

2018-08-07 Josh Rickard

Creating a Deployment Task Sequence

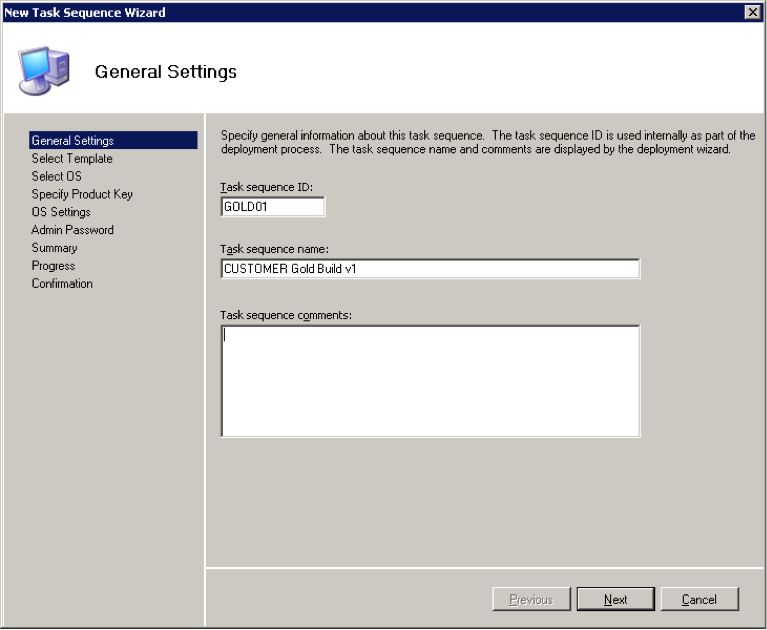
  1. From the Deployment Workbench, expand the customer Deployment Share and right-click on Task Sequences and select New Task Sequence
  2. Enter a Task Sequence ID and Name.  Make a note of the ID as you may need it later!

28

  1. Accept the default “Standard Client Task Sequence” template
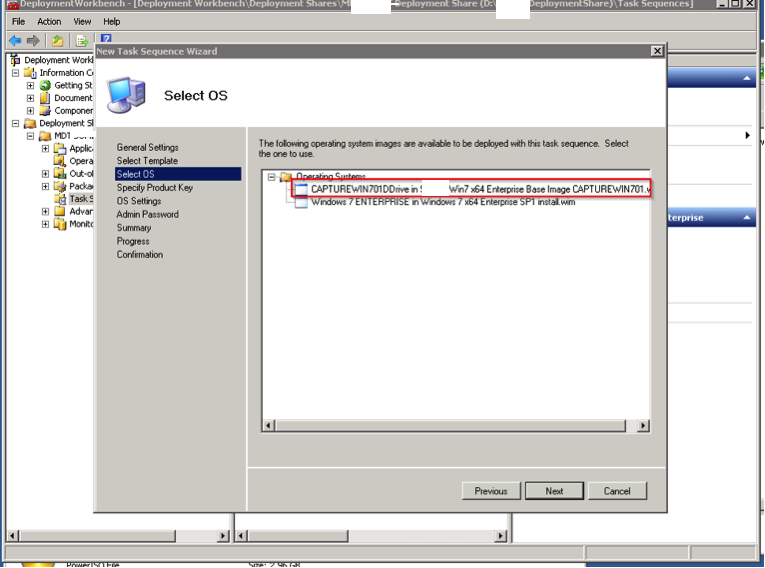
  2. Select the relevant OS Image to deploy

 29

  1. This option will vary dependent on whether you are going to be using KMS or MAK licenses for their Windows 7 deployment.
KMS          -                 Select Do not specify a product key at this time

MAK         -                 Select Specify a multiple activation key (MAK key) for activating this operating system

Continue reading

Mdt 2012 Deployment Guide Step by Step 8 of 11

2018-08-07 Josh Rickard

Importing a Customer Reference Image

  1. From the Deployment Workbench, expand the customer Deployment Share and right-click on Operating Systems and select Import Operating System
  2. From the Import Operating System Wizard, select Custom Image File and click Next
  3. Browse to the path of the WIM file.  For captured images, this would by default be the \Captures folder in the Deployment Share
  4. Select “Copy Windows Vista, Windows Server 2008, or later setup files from specified path” and enter the path to the relevant OS installation media.  (Strictly speaking you shouldn’t need to do this step but it bugs out sometimes in my experience)

Continue reading