Lets Automate It

from Josh Rickard

Mdt 2012 Deployment Guide Step by Step 7 of 11

2018-08-07 Josh Rickard

            Capturing a Windows 7 Image from a reference PC

The reference computer should be connected to the same network as the MDT Deployment server and should be set to get an IP address via DHCP.


THE REFERENCE COMPUTER MUST NOT BE JOINED TO ANY DOMAIN!


  1. Boot the reference computer and ensure network connectivity
  2. Make any last-minute modifications (additional software, Windows Updates, etc.)
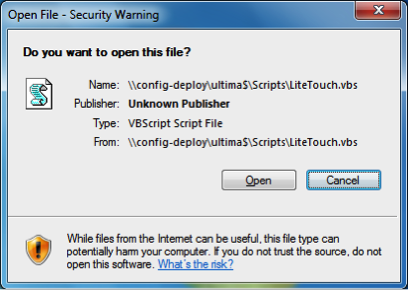
  3. Click Start and type \\<MDTSERVER>\share$\scripts\litetouch.vbs and press Enter
    1. If prompted for credentials, enter a domain account with access to that share:
    2. If prompted with a Security Warning like the one below, click Open
    3. 21
  1. Select Sysprep & Capture Win7 Reference Image from the Task Sequence selection screen
  2. 22
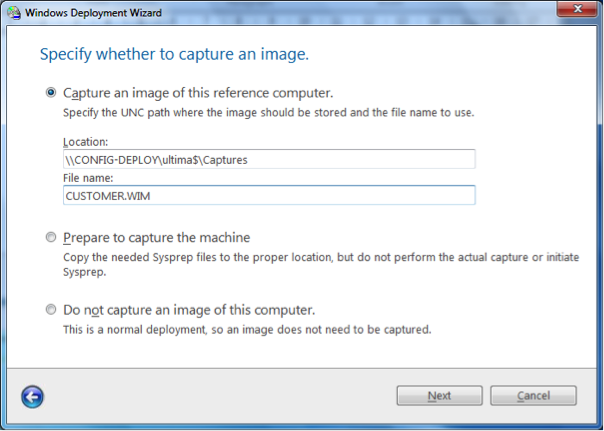
  1. Select Capture an image of this reference computer from the Capture an Image selection screen and enter an appropriate file name.
  2. 23
  1. Wait while the Windows PE environment is copied to the reference computer and SYSPREP is run

 24

Continue reading

Mdt 2012 Deployment Guide Step by Step 6 of 11

2018-08-07 Josh Rickard

Completing the Deployment Share Configuration

Now you have imported an OS (from source media) and some WinPE drivers, we can go ahead and complete the configuration of the Deployment Share.

6.1       Advanced Configuration

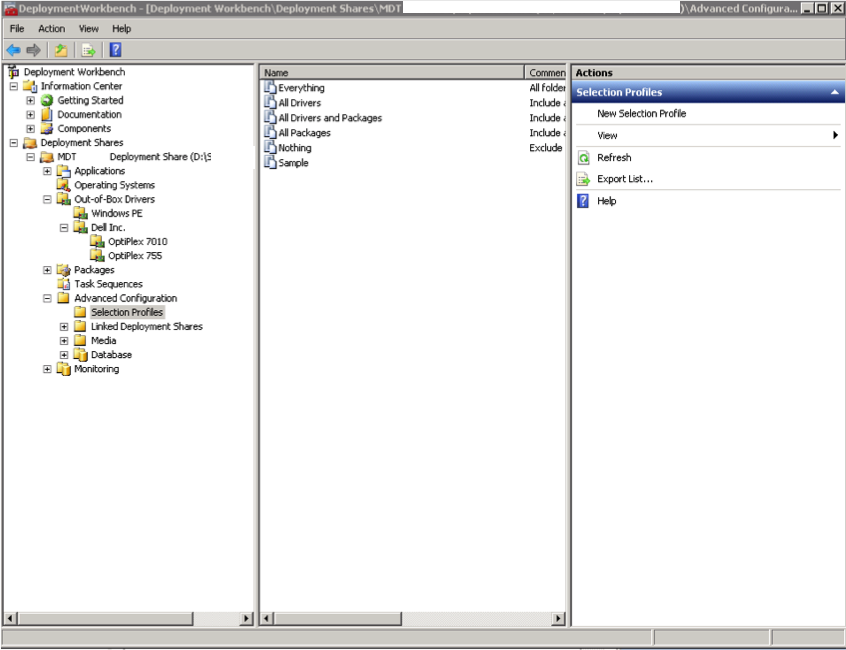
The Advanced Configuration section of MDT consists of four separate areas although, we only use the Selection Profiles section for now.  The rest are advanced topics which you can explore later!

Advanced Configuration – Selection Profiles

Created a single additional selection profile – “WinPE Drivers” and configured it to contain only the drivers which Windows PE will use.  We’ll use this profile in a moment to configure the Windows PE environment.  The next three photo's are in order by actions:

15

Continue reading

Mdt 2012 Deployment Guide Step by Step 5 of 11

2018-08-07 Josh Rickard

 Creating a Sysprep & Capture Task Sequence

The “Task Sequence” is the heart of the MDT deployment solution.  It is a list of steps which need to be taken to successfully deploy an Operating System.


Initially you need to create a “Sysprep and Capture” task sequence.  Go ahead and do this now.  You don’t need to worry too much about which choice of OS you make as it doesn’t matter.  Make sure you select the “Sysprep and Capture” template!

Mdt 2012 Deployment Guide Step by Step 4 of 11

2018-08-07 Josh Rickard

4.          Importing an OS Image

The Operating Systems section of MDT lists all of the Operating Systems which are available to deploy from a Deployment Share.  The deployment itself is controlled by a Task Sequence but the operating system source files need to be available.


Simply right-click on Operating Systems on the left and Import your Windows 7 source media from either DVD or a network share.  If you are planning to deploy both 32 and 64 bit versions, import both!  You can also import Windows XP, Vista, Server 2003, 2003R2, 2008 and 2008R2 for deployment…

Continue reading

Mdt 2012 Deployment Guide Step by Step 3 of 11

2018-08-07 Josh Rickard

Device Driver Management

3.1       Obtaining Device Drivers for a Deployment

In order to deploy a single image to multiple hardware types, MDT performs a “driver injection” during the OS load process.  For this to work, any and all relevant drivers need to be imported into the deployment share in advance.  Depending on the hardware vendor, the process for obtaining these drivers may vary but will generally involve going to the vendor website and downloading the drivers for specific hardware models.  Once you have downloaded these drivers, they may require unpacking as the import process can only recognise drivers containing .INF or .CAB files.


Continue reading

Mdt 2012 Deployment Guide Step by Step 2 of 11

2018-08-07 Josh Rickard

2.1       Creating an MDT Deployment Share

An MDT Deployment Share is the specific deployment environment which will be used for OS deployment.  The share contains all elements of the deployment including drivers, applications, OS images etc.
  1. Log on to the MDT server and open the “Deployment Workbench
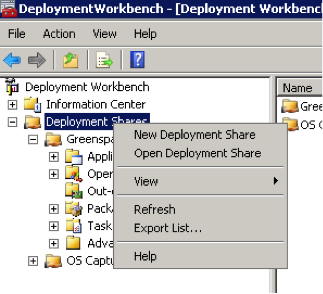
  2. Right-click on “Deployment Shares” in the left pane of the workbench and select New Deployment Share

2

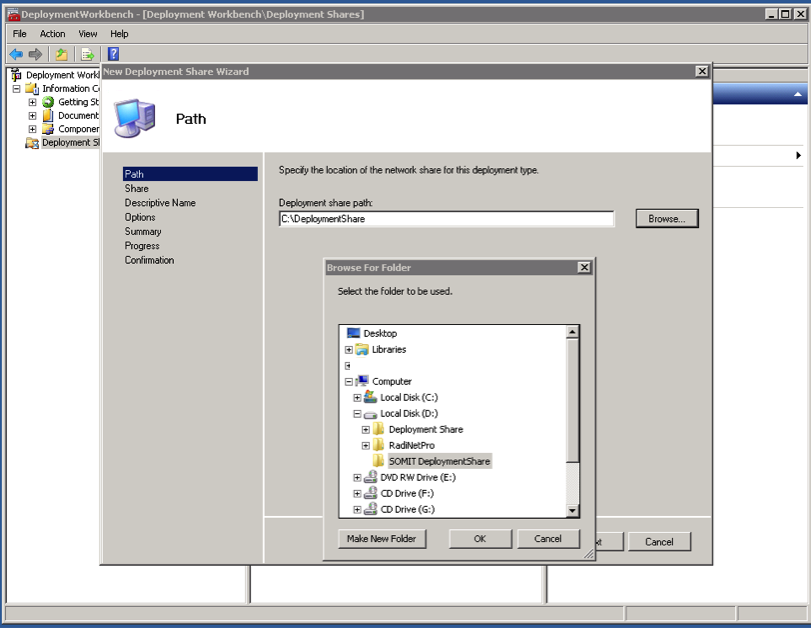
  1. In the New Deployment Share Wizard, choose a location for the new share.   Once you’ve selected a folder, click Next
3
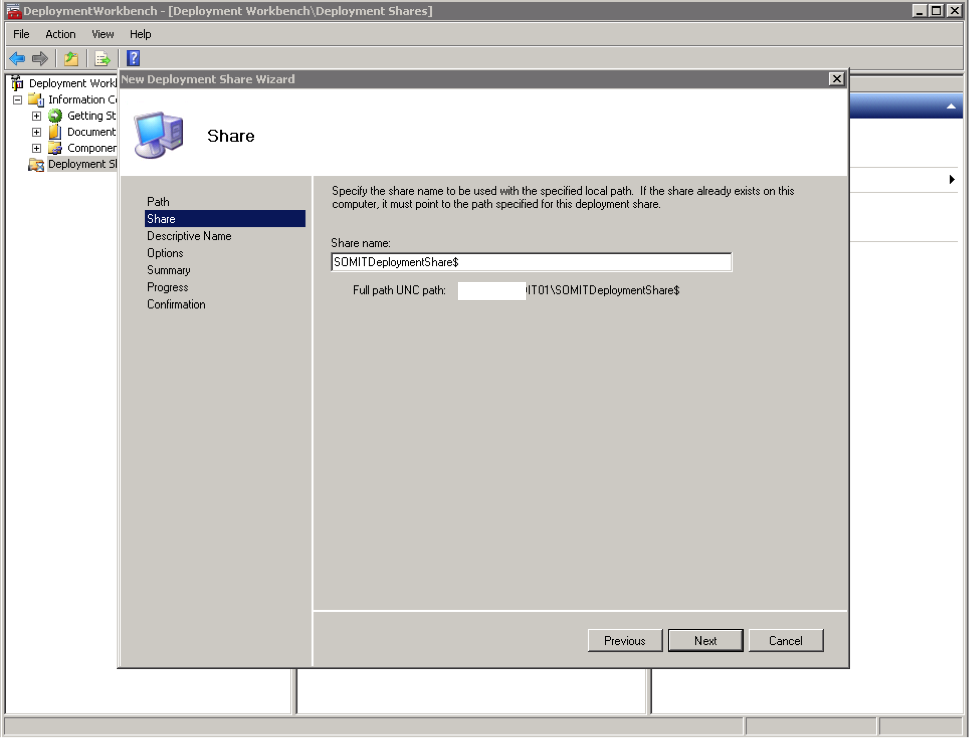
  1. Give the share a name – the name used previously should be fine.  Click Next
  2. 4
  1. Enter a descriptive name for the share (“NewCustomer Deployment Share” for instance) and click Next
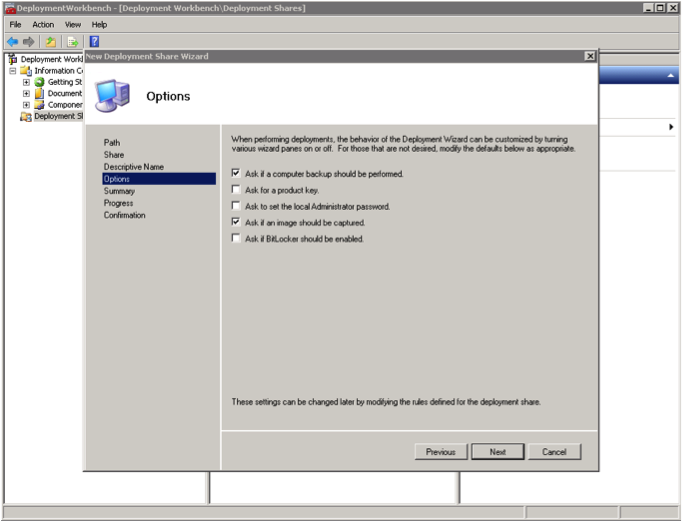
  2. Uncheck the next three options - Allow Image Capture, Allow Admin Password and Allow Product Key – click Next after each
5
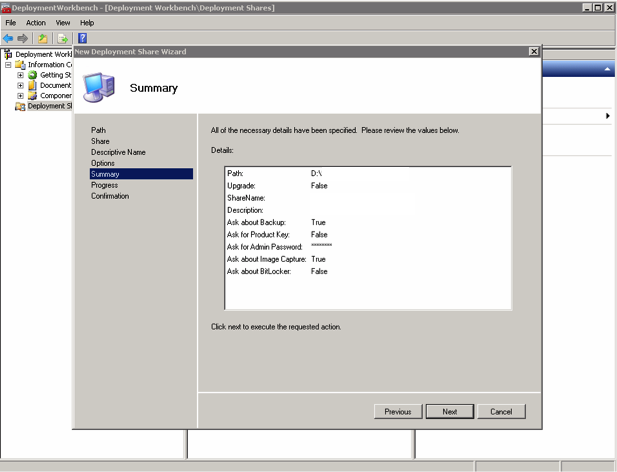
  1. The Summary screen should look similar to the one below.  Click Next
  2. 6
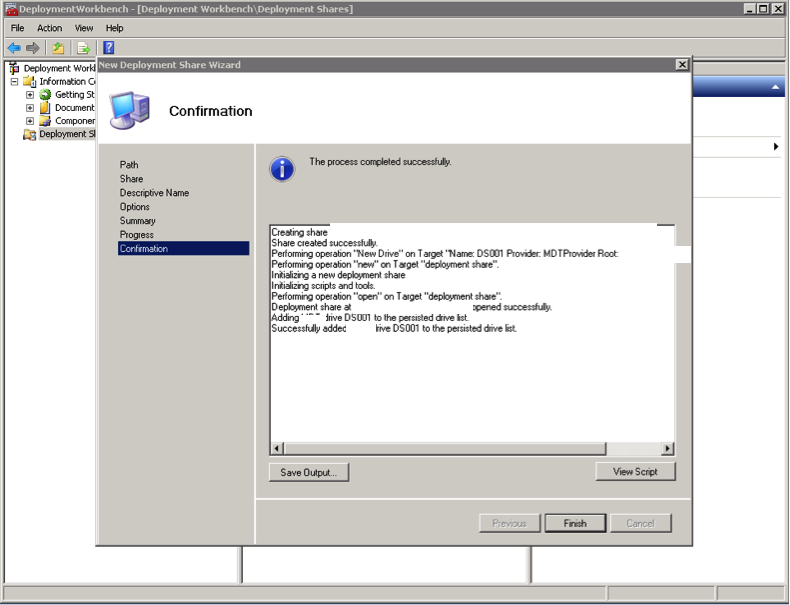
  1. Wait while the deployment share is created.  Once this is done, a Confirmation screen will be shown.  Ensure no errors appear.
7
  1. Click Finish


Continue reading

Mdt 2012 Deployment Guide Step by Step 1 of 11

2018-08-07 Josh Rickard

1.0    Deployment Infrastructure Overview

The new OS Deployment Infrastructure for the Configuration Centre is based around Microsoft Deployment Toolkit 2010 with Update 1.  MDT relies on a number of underlying software components and is able to deploy a number of different Operating Systems including Windows XP, Windows Vista and Windows 7 on the client side and Windows Server 2003, 2008 and 2008 R2 on the server side.  This document is focused on deployment of Windows 7 clients.


Continue reading
Older posts Newer posts